Coming from a country where the food is amazing I naturally expect to find nothing but the best when it comes to food. Imagine my surprise when we moved to Halifax and found out that there is no real pita bread here, like the one we know and love from back home.
So what do you do? You DO. You make your own pita bread.
Here’s how:
Ingredients for 12 nice sized pitas:
5 ½ cups flour
About 2 ¼ cups lukewarm water
1 tbsp dry yeast
1 tsp sugar
1 tsp salt
Directions:
1. Mix all the ingredients together. Remember that yeast dough REALLY loves hands, so make sure you knead it really well for at least about 7 minutes. Until you see it is nice, soft and all ingredients are mixed well.
The texture should be soft and even a little bit sticky.
2. Put some oil on your hands and make a ball shape of the dough. Place it in a big bowl, cover with plastic cling wrap or a clean towel and place in a nice warm place. Let it stand for about 30-40 minutes until it rises and reaches twice its original size.
3. After 30-40 minutes, knead it once again letting all the air in the dough out. Now, you form 12 balls in the approximate size of a tennis ball. Place the balls on a floured or oiled surface so they don’t stick and let them stand for another 30 minutes until they rise. Make sure you place them about 10 cm away from each other as you don’t want them to stick together.
Meanwhile turn your oven on to the maximum temperature available and prepare a baking pan with parchment paper on it.
4. After 30 minutes, take each ball and flatten it to a circle about 1 cm thick. Make sure you do this on a floured surface.
5. Place the flattened ball (almost a pita now) on the baking pan and place in the oven. You can put a few pitas at once, as long as they are not too close to each other. 

6. After about 2 minutes you’ll see that the pita rose and is now a nice round pita. This is when you open the oven and quickly yet carefully turn the pita on its other side and let bake for another minute or so.
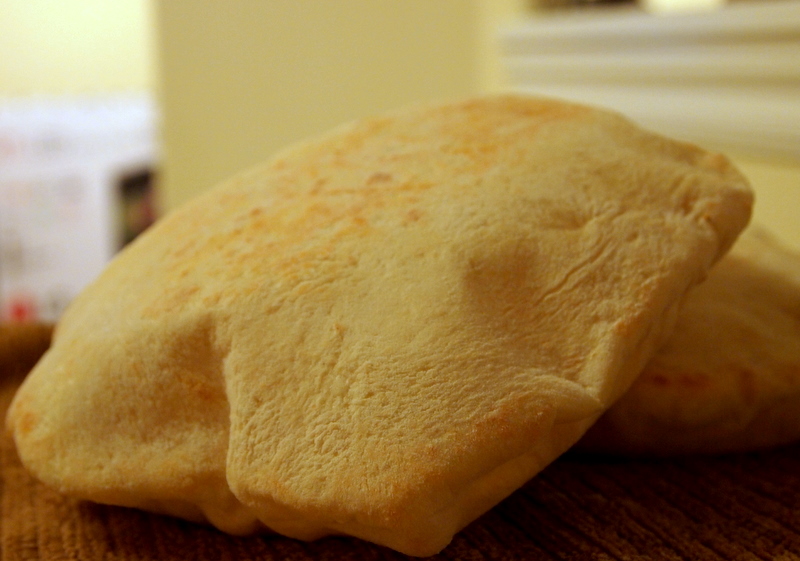
7. After a total of about 3 minutes the pita is ready. Take it out of the oven, place on a tray/ towel/ plate and cover with a clean kitchen towel to prevent it from drying.
That’s it. The pita is ready. It’s not too hard to make but the tricky part is the in and out of the oven part so pay close attention

You can now fill the pita pocket with whatever you like. You can also freeze it
and defrost when needed, just like you do with bread.

can this pita bread be made with spelt or any other ancient grain flour such as buckwheat , soy or oat?
Hi Rose,
To make this with any flour other that wheat flour you’ll need a whole different recipe.
These pitas become actual fluffy pockets thanks to their gluten. Once you use a flour that is either low on gluten (like spelt) or no gluten at all, it won’t turn out right.
What you can try doing is mixing half spelt and half wheat and but then you need to change the water quantity.
I hope this helps.